Avatar Studio
Start with your current avatar. Change its look, put it in a setting, then speak to it before publishing.
Open Characters, select a character and choose Model & Face on the left. The character settings stay beside the workspace. The tabs across the top choose the avatar source; Scene & animation opens the tools for the space around it and what it does.
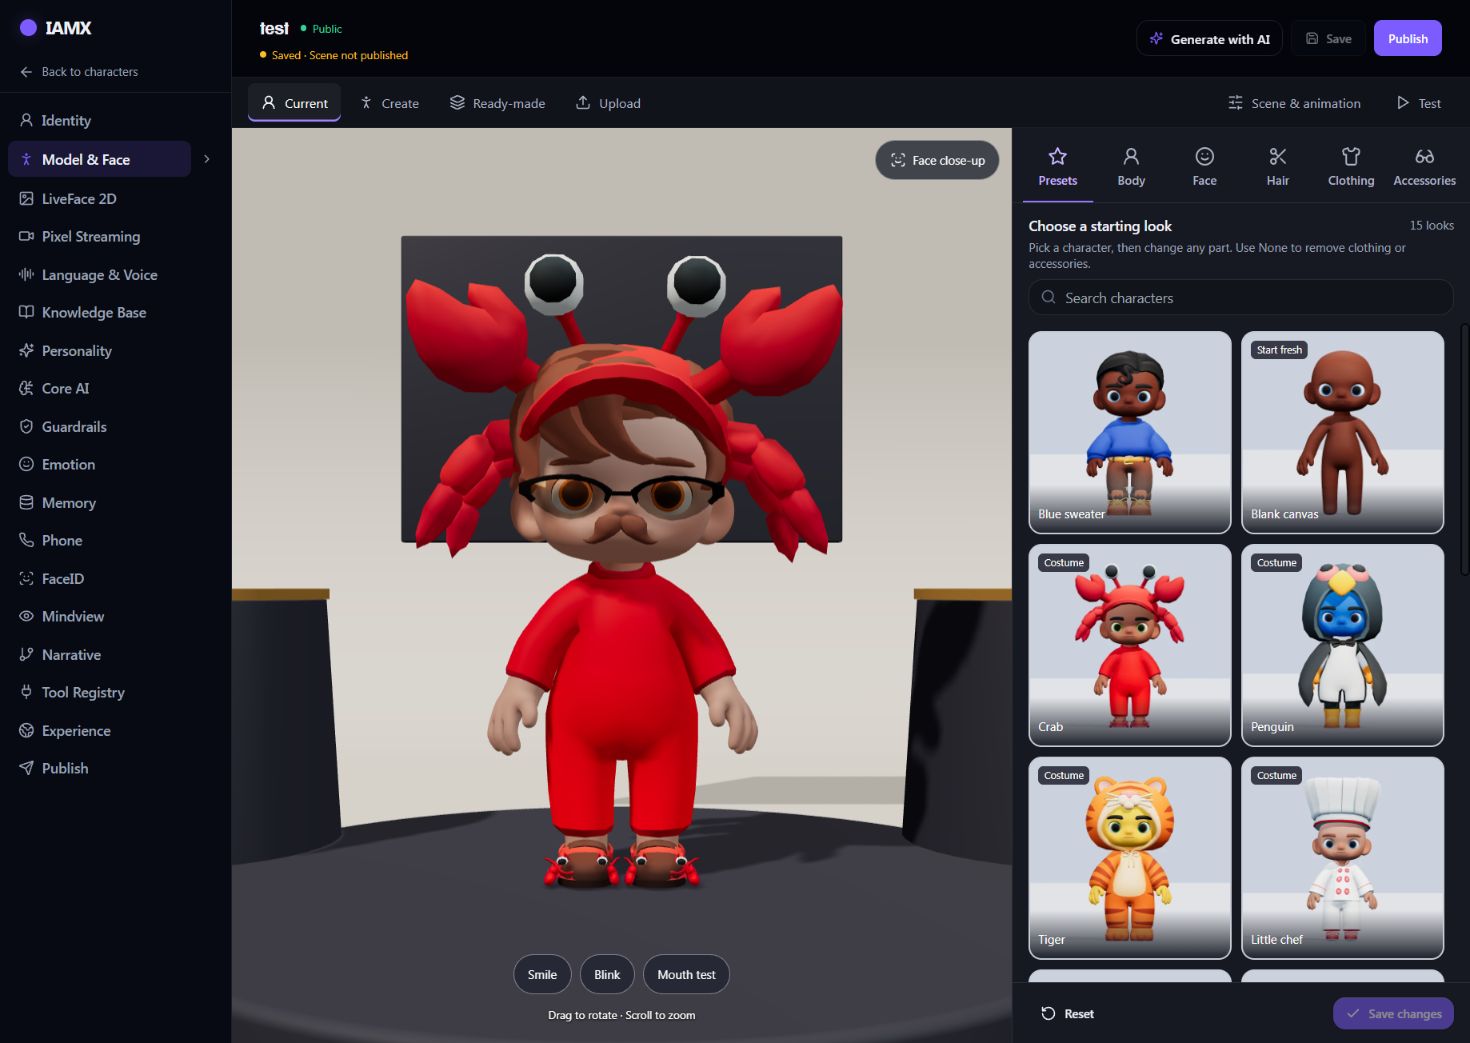
Choose where to start
| Tab | Use it when |
|---|---|
| Current | You want to see or edit the avatar already assigned. A character made with the modular creator opens with its saved choices. An uploaded or ready-made model shows the controls available for that model. |
| Create | You want to build a new look using IAMX body, face, hair, clothing and accessory choices. |
| Ready-made | You want to use an existing character from the catalogue, including available RPM characters. |
| Upload | You have your own supported model. Follow the custom avatar guide for facial shapes, animation compatibility and file preparation. |
Build a look from a preset
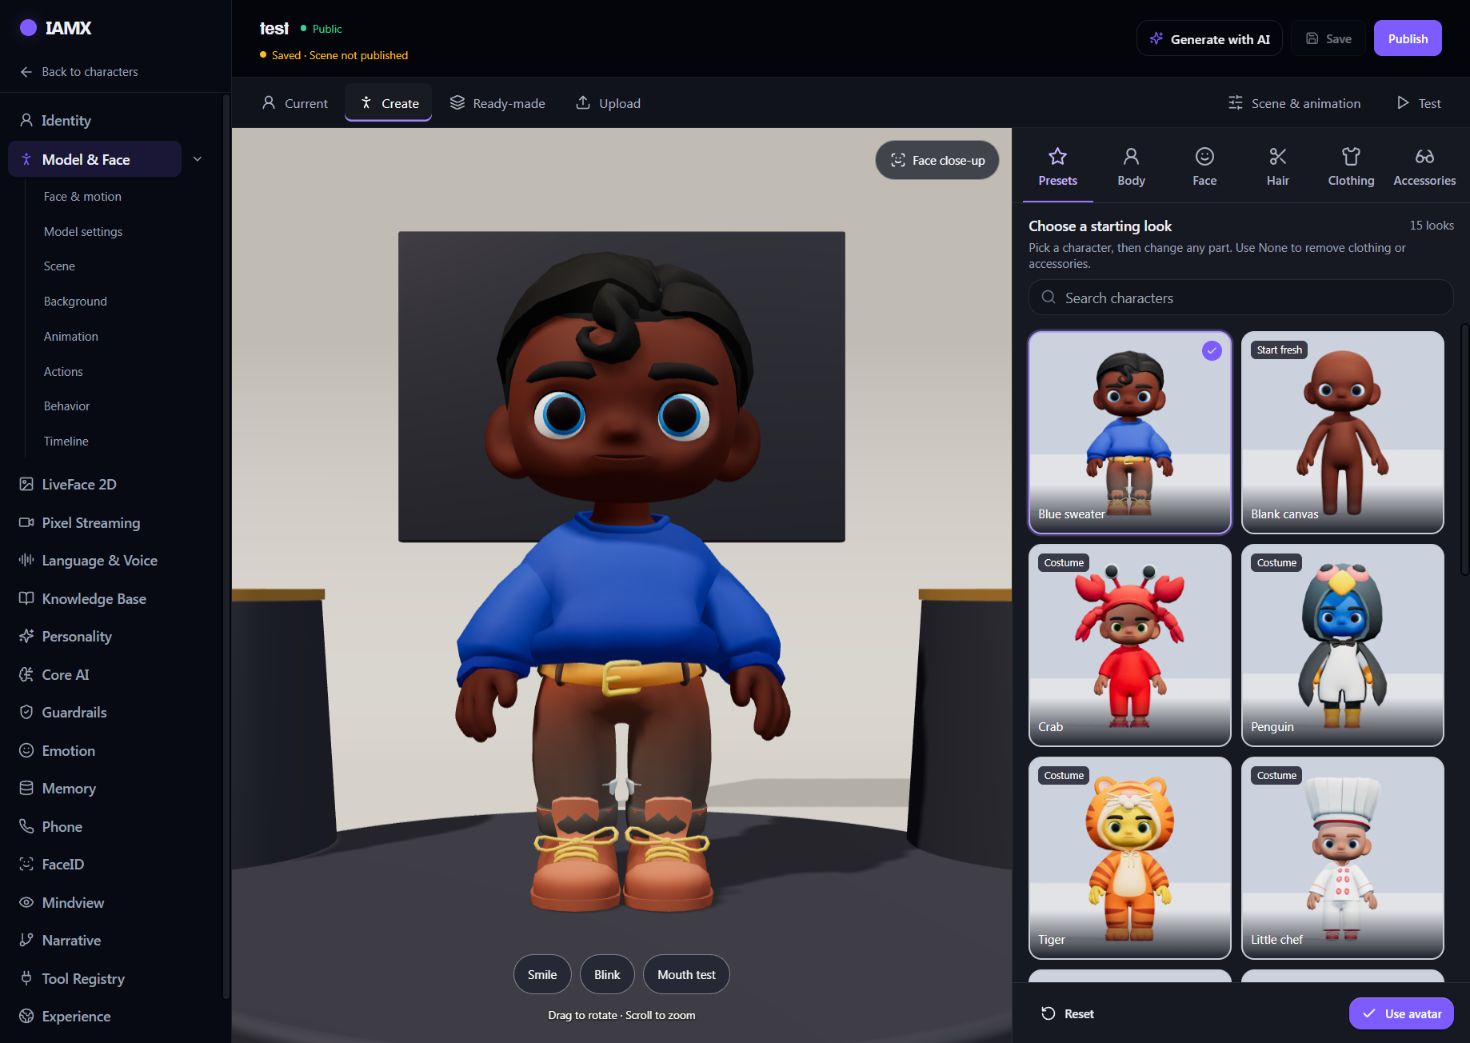
- Open Create and choose Presets. The star-marked category opens first. Choose one of the 15 starting looks, including everyday clothing, costumes and Blank canvas.
- Change the parts you want. Use Body, Face, Hair, Clothing and Accessories. Some categories contain more specific choices such as eyebrows, shoes or glasses.
- Remove unwanted items with None. A full outfit can hide separate clothing, and a hat can hide hair. Remove the covering item to see the selection underneath.
- Inspect the result. Drag to rotate, scroll to zoom and use Face close-up. Try the smile, blink and mouth tests.
- Apply the avatar. Choose Use avatar for a new creation or Save changes when editing your current modular avatar. Wait for saving to finish before leaving.
Choose a background and set
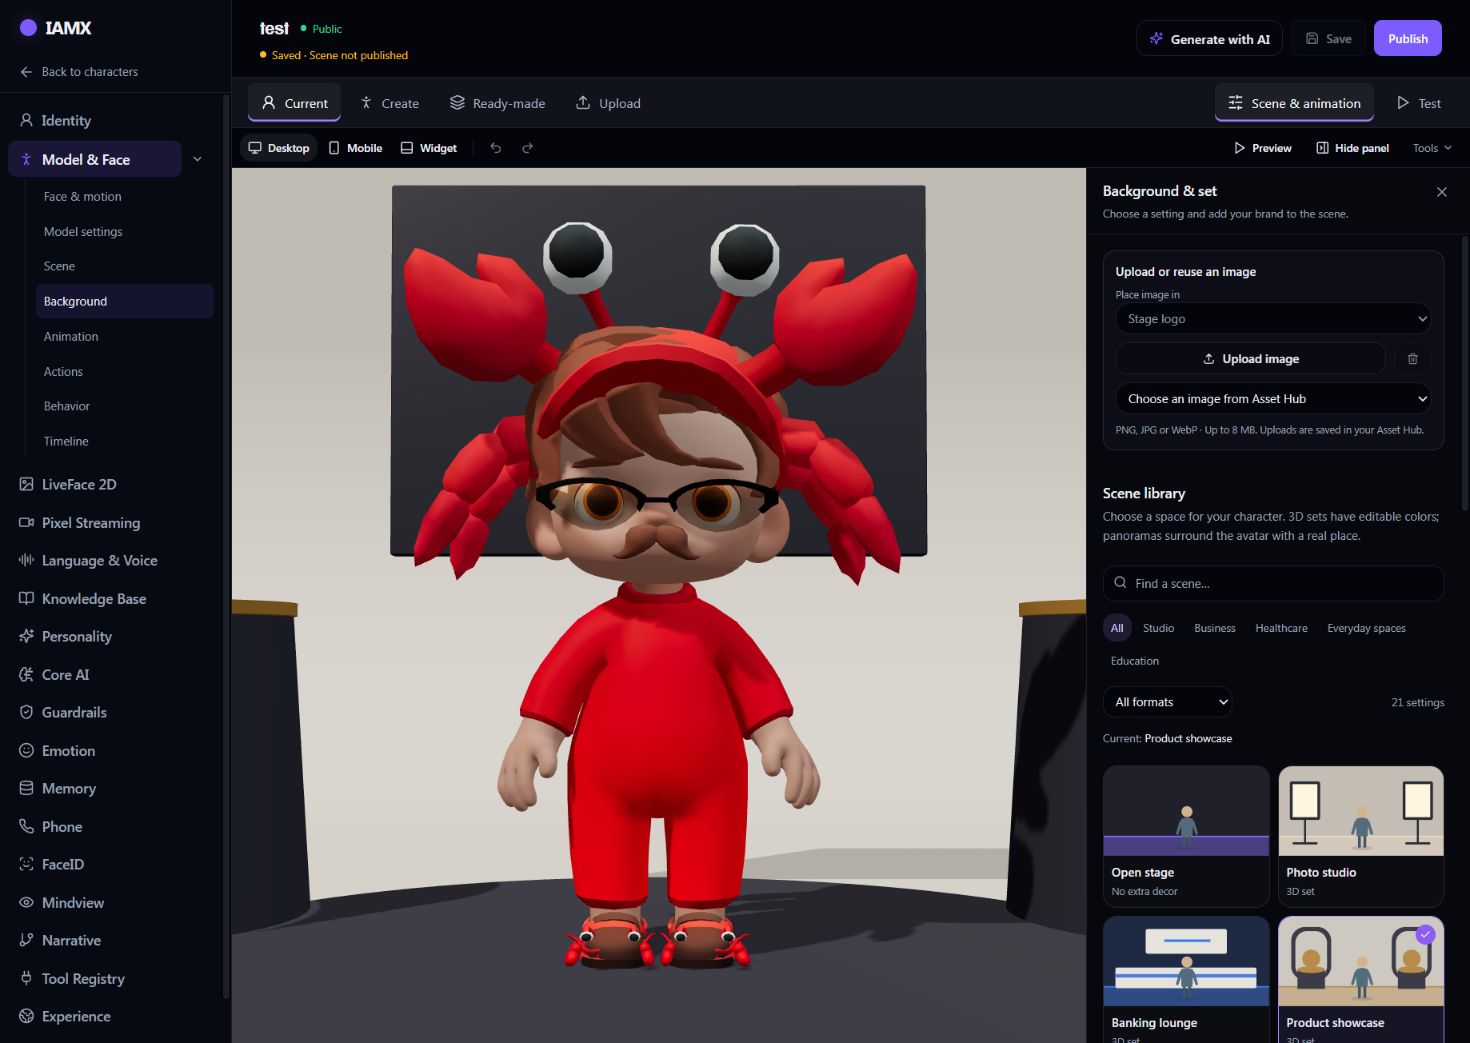
Open Background under Model & Face, or choose Scene & animation → Scene → Background & set. This is the scene library. The photo-studio colors in Light & environment are a separate group of settings.
| Choice | What you can change |
|---|---|
| 3D sets | Choose settings such as a kitchen, clinic, hospital reception, office, meeting room, café, living room or showroom. Available controls include scenery colors, branding and size. |
| Real places · 360° | Use a photographed panorama such as a kitchen, hospital room or café. Adjust View direction to choose what appears behind the avatar and Environment light to tune its brightness. |
| Classroom | Choose Classic classroom, Bright classroom, Library seminar or Science lab. See Teacher mode for board content and teaching. |
| Photo studio | Open Light & environment for colored studio backdrops, lighting presets and a circular, square or hidden platform. |
Use the category, format and search filters to narrow the library. If a scene appears missing, clear those filters first. Selecting a panorama changes the environment and lighting; check your character's appearance again after switching.
Frame the character
Open Camera to set the view. Check the face, feet and any teaching board at the size visitors will actually see. Save your work, then use Publish to apply the scene's background, lights, camera and character placement to the published character.
Choose idle, talking and listening animation
In Scene & animation → Motion, use Animation library to preview movements and Idle, talk & listen to assign the three conversation states.
| State | What the visitor sees |
|---|---|
| Idle | The avatar waits between interactions. |
| Talking | The avatar moves while delivering a reply. |
| Listening | The avatar responds visually while receiving visitor speech. |
Preview all three states on the actual model. An animation that works on one skeleton may distort another. If hands enter the body, limbs twist or the avatar jumps position, select a compatible clip and inspect it again before publishing. Face expressions also need matching facial shapes; a body animation alone does not provide lip sync.
Make something happen automatically
An action is what plays: a gesture, narration, music or video. A behavior decides when it plays. Start with a single welcome action before combining several steps.
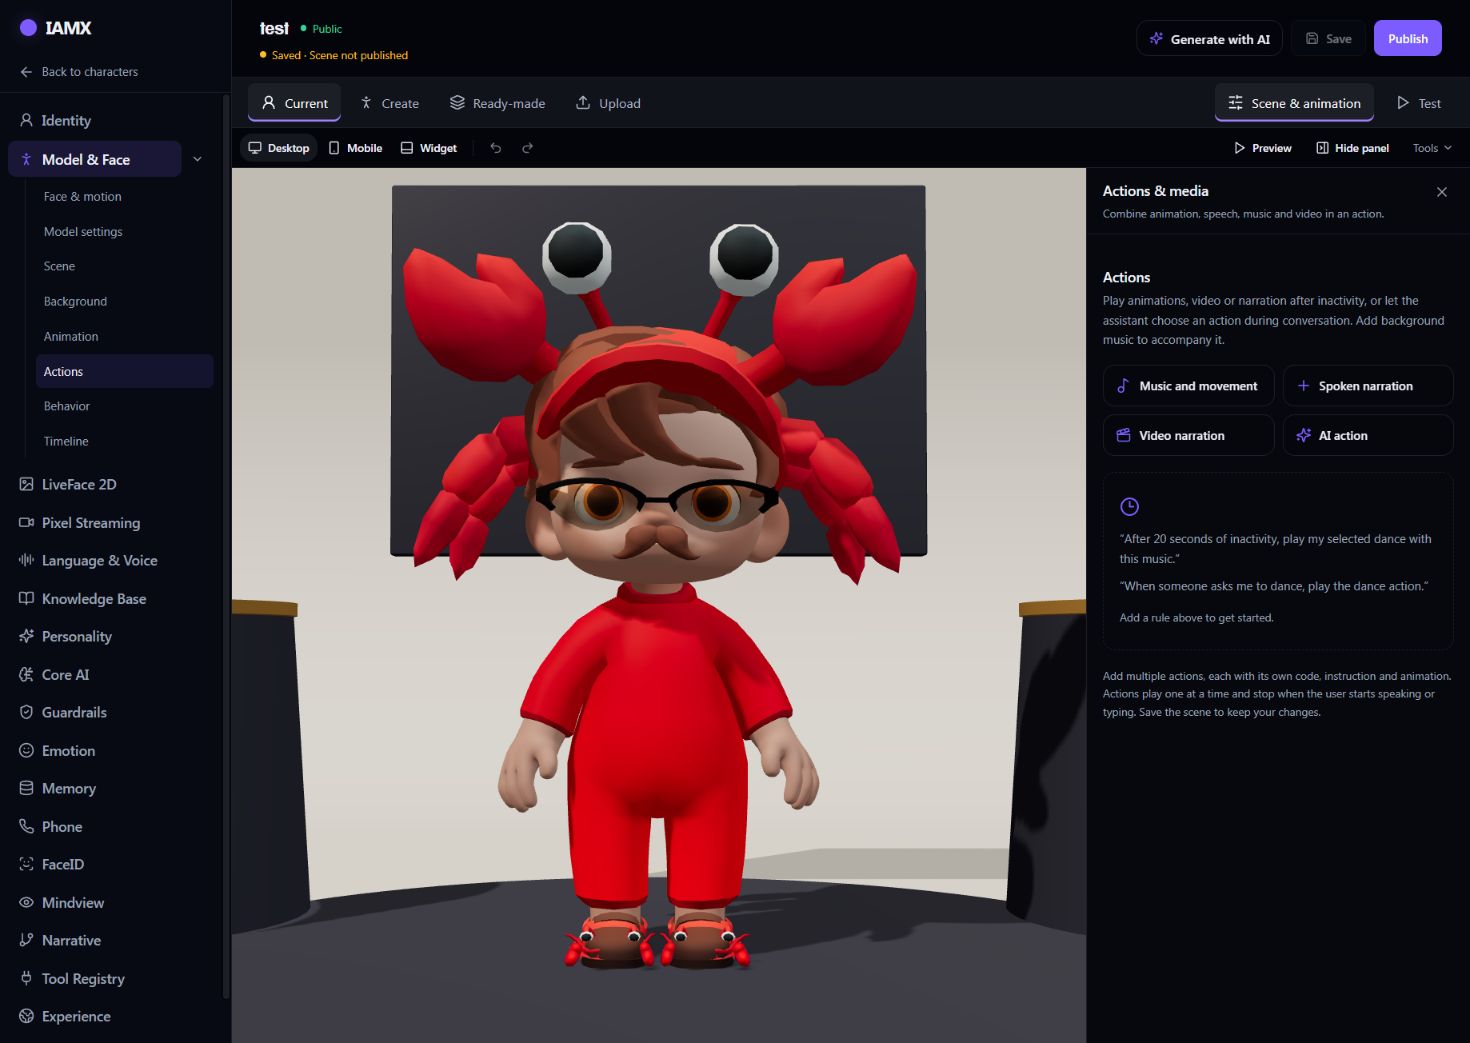
- Create the content in Actions & media. Give the action a clear name. Add animation, narration and optional music or video. Preview the media and check their volumes.
- Open When & what. Add a rule for a visitor arriving, a period of inactivity, person detection, an AI action code or a card/button click.
- Choose what the rule plays. Select your action, or a timeline for several timed steps. Set the delay and any repeat options.
- Test the trigger. Start a fresh test for a first-visit rule. Leave the preview untouched for inactivity. Person detection needs the actual camera and configured recognition behavior.
- Save and publish. Check the same behavior in the published website template.
A rule with repeat turned off runs once after a successful start in that scene session. Conversation takes priority over starting a behavior. An AI-code trigger requires the configured action command; mentioning the action's name in ordinary text is not enough.
Use Cards & forms for clickable content, Timing to place media on a timeline and Presentations for a guided sequence. You can add these after the basic action works.
Test a real conversation
Select Test at the top of the avatar workspace. Edited selections are saved first, and the full-page test opens with the current avatar and scene. Type a message or tap the microphone. Back to editing returns to the workspace.
For website behavior, open Publish preview in the Studio tools. Its Test room offers desktop, mobile and widget views, a first-visit restart, interruption and framing checks. By default it shows the last published scene; Preview unsaved scene applies your draft only inside that test.
Save, then publish the scene
- Save the character and Studio edits. Check that the header no longer shows unsaved changes.
- Publish from the character header or Publish page. “Scene not published” means the saved scene has not yet been applied to public embeds.
- Open published scene and compare it with the editor. Check the background, framing, animations and voice.
- Preview your website template and copy its generated code. Follow the website embed guide.
Website page awareness has its own Save experience and Publish experience controls. See Website experience to let the avatar understand the current page and guide visitors.
If the result is different from the editor
| Problem | What to check |
|---|---|
| The old look is still visible | Apply the selected avatar with Use avatar or Save changes, then publish and start a new preview. |
| The background is missing | Publish the saved Studio scene. Check whether the widget uses transparent Floating Companion. |
| There are only colored studio backdrops | Open Background & set for the scene library; Light & environment contains the photo-studio presets. |
| An uploaded avatar has no clothing choices | Those choices are for modular collection characters. Use that model's supported settings, or create a new modular avatar. |
| The test asks you to sign in | Reopen the preview from your signed-in character workspace. A private test link is not a public sharing link. |
| The action does not start | Check that its rule is enabled, a target is selected and the trigger occurs. Restart a first-visit test after a once-only action has played. |
Maintained by IAMX. Updated .